So you got a Canik TP9SA and you want to stop the Decocker from doing it’s thing. Well sit back and we will show you how to get that done.

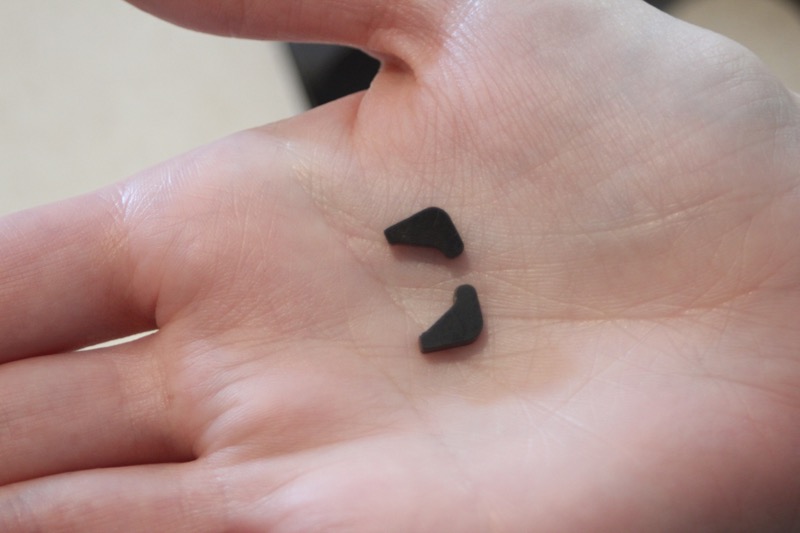
First things first, go to our webstore and buy you one of our Decock Block kits for the Canik TP9SA. Once delivered, remove from packaging. You will see 2 rather small pieces of black stainless steel. You will also see a pretty sweet sticker in there that you should put on the back window of your horseless carriage to show the world how awesome you are. And dude, chicks totally dig free marketing for small, family owned companies. Just saying.
Next you will need the following items:
1 – Canik TP9SA in the color of your choice
1 – Small, Flat Blade screw driver
1 – Arson Machine Co Canik TP9SA Decock Block kit
2 – Functioning hands
1 – Thing of grease or vasoline (this is optional but really helps things go together well)
1 – Pair of safety glasses, just to be safe
First step is to MAKE SURE YOUR PISTOL IS NOT!!!! LOADED. You should know better than to work on a loaded gun. Don’t be an idiot. Check it, thrice.
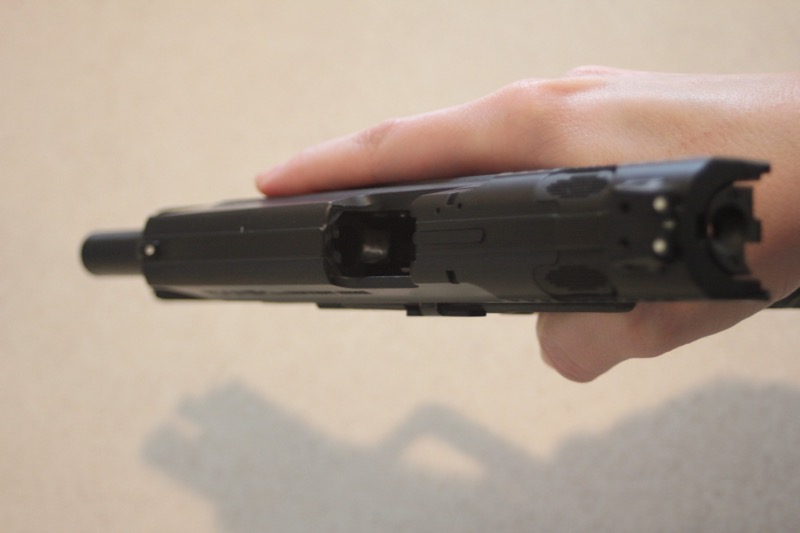
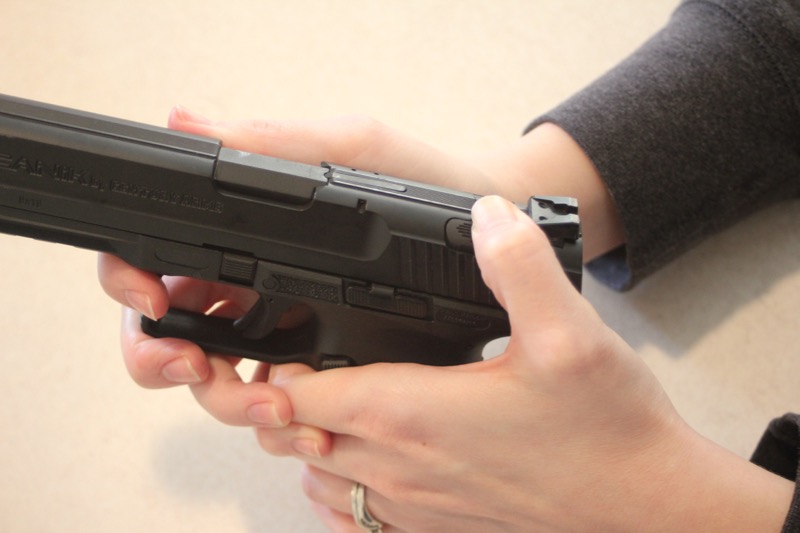
Once the gun has be triple verified as being unloaded, you will need to remove the slide. To do this press the decock button on the top of the slide or simply pull the trigger whilst the pistol is pointed in a safe direction. Then pull down on the slide release with your index finger and thumb and proceed to remove the slide from the frame.

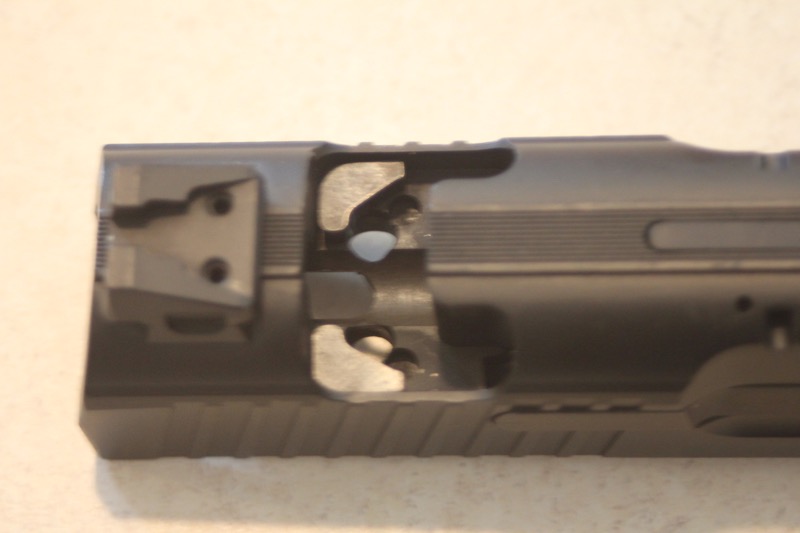
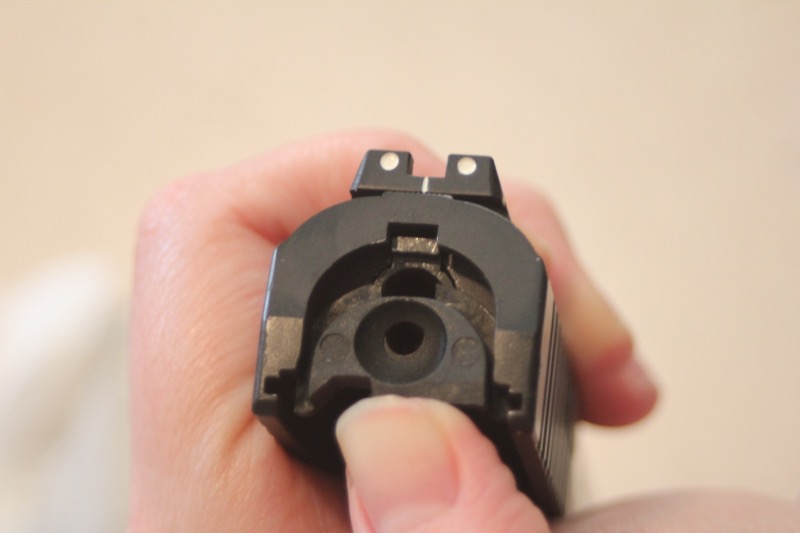
You do not need to remove the barrel, guide rod and recoil spring for this installation, but it never hurts to take it out and have a look anyway. Maybe even clean and lube it while it’s out. Two birds with one stone and all that. With all that done, its time to get the firing pin out of there. To do this grab the slide and the small flat blade screwdriver. With the rear of the slide facing up, take the screwdriver and press at the small rectangular slot at the top of the striker retention plate (that black plastic thingy at the end of the slide that has the hole in the middle). You will need to press down with a bit of force to move the striker forward a little. Once it has moved enough and while still under tension, slide the striker retention plate down and out of the rear of the slide. This is very similar to disassembling a Glock pistol.

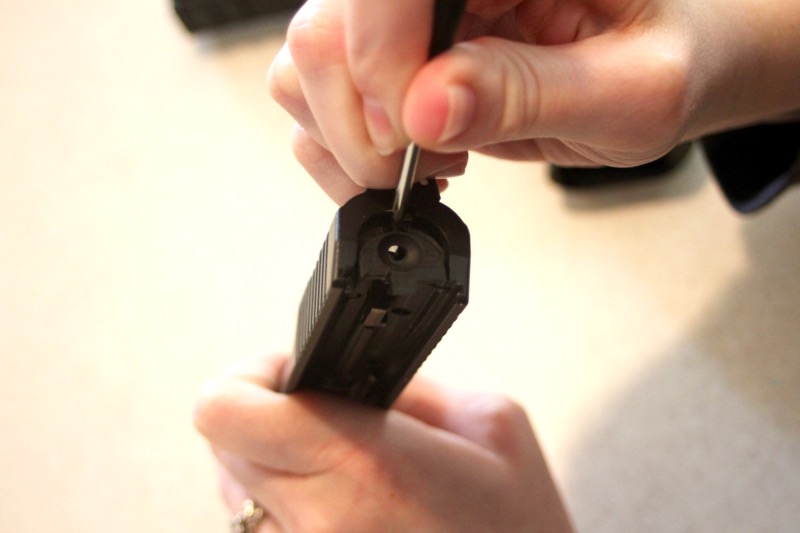

Once this is done, slowly remove the tension from the striker assembly. This is where using safety glasses is nice insurance. Safety Third. Next, put a finger over the decocking button and gingerly slide the striker out the back of the slide. Now the decocking button is ready to be removed.

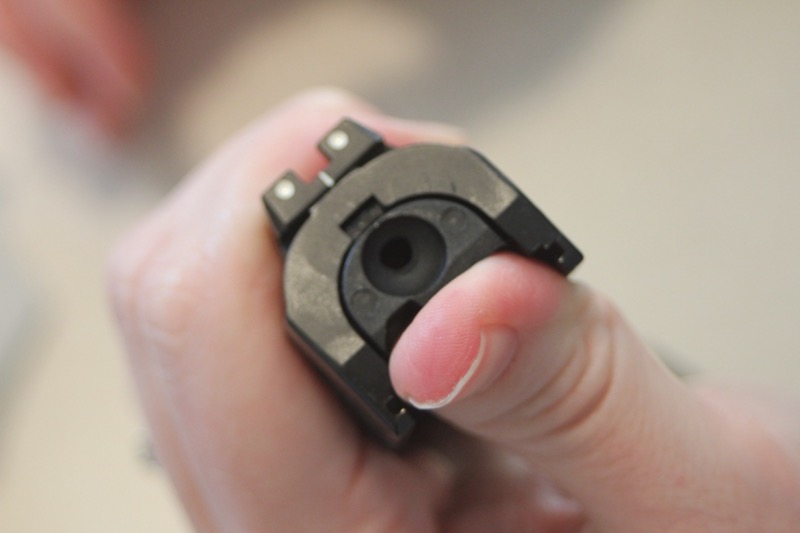
Be very careful here. There are 2 small-ish springs that will be loosed once it it pulled up and they can wander off.
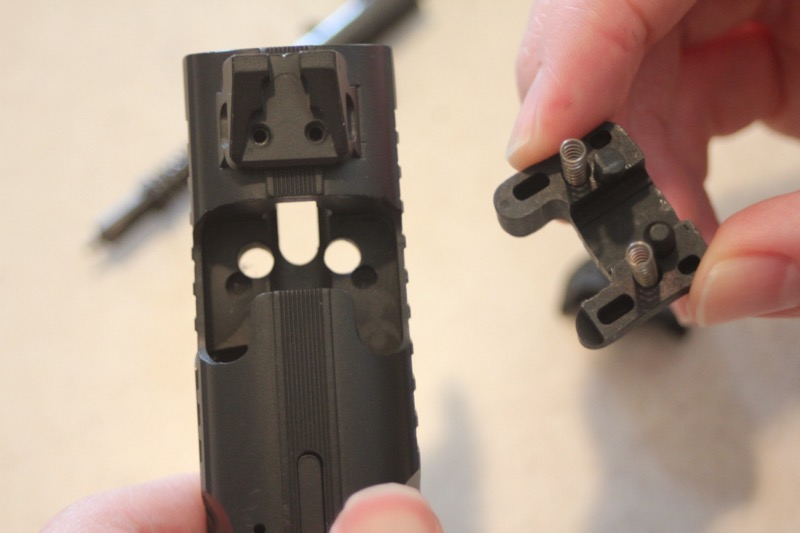
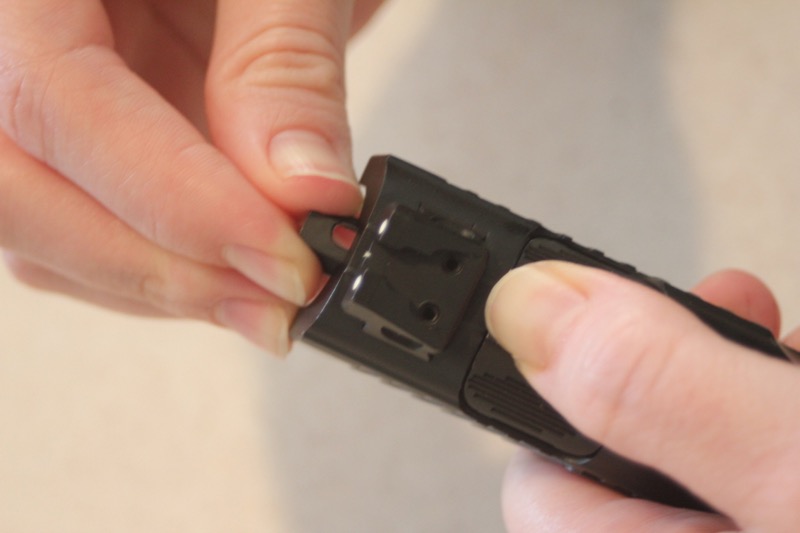
Now take your Arson Machine Co Canik TP9SA Decock Block kit and prepare for installation. To aid in retaining the 2 small block plates, we recommend putting a small dab of grease on each plate. They don’t need to be lubed as they are a fixed part, but they do tend to wander about with very little effort so the grease helps hold them where they need to be for easier reassembly. It is not 100% needed but it definitely helps. Note the Decock Block plates will only work in the orientation shown in the picture. If they are installed in any other way, they will not allow proper reassembly. Basically stuff won’t work or go back together right. If need be, tweezers or small needle nose pliers can be employed if your fist are made of ham.
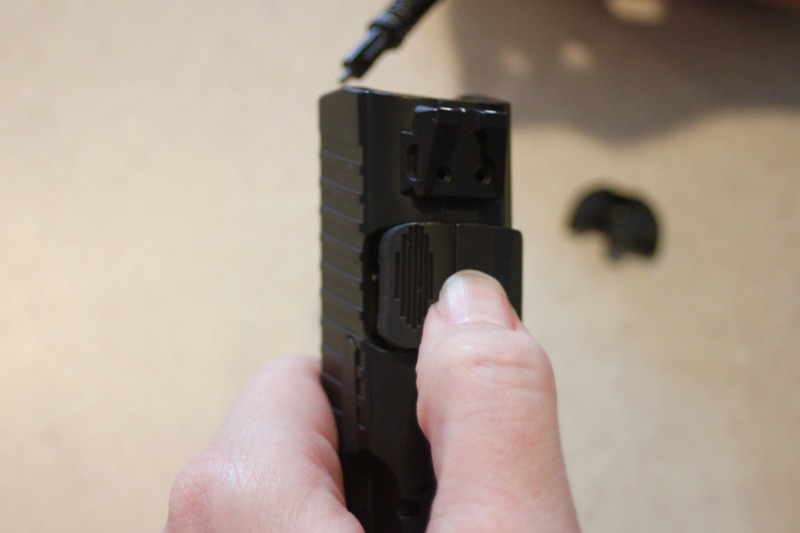
Now to reassemble, you can also put a small dab of grease on the end of the springs that sit in the decocking button. Again, not necessary, but aids in the reassembly process. And you only need a tiny bit. With the springs installed in the button gently insert the decocking button into its pocket minding the 2 small pockets for the springs.
You should only be able to move the button a tiny bit. Press on the button and reinsert the firing pin. Then take the striker retention plate and slide it in until it contacts the firing pin assembly.
Then take your small flat blade screwdriver and press the striker sleeve into the channel enough to slide the retention plate into it’s happy home.

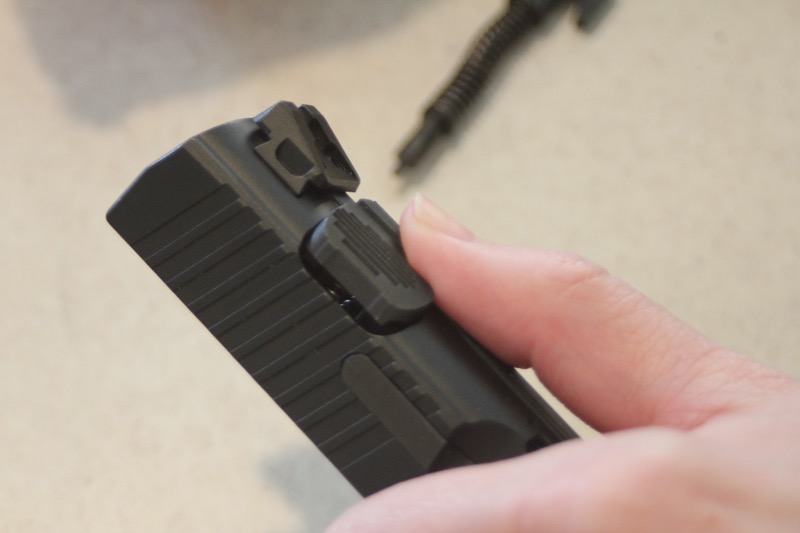
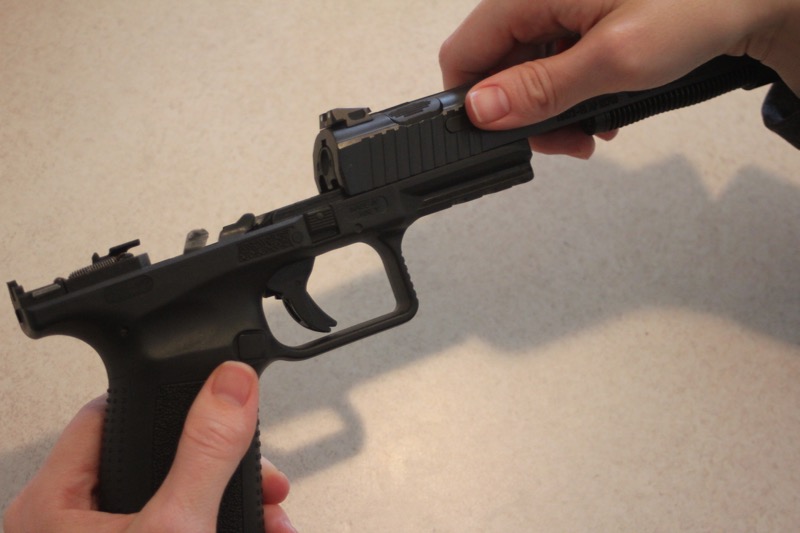
Once that is installed correctly (and be careful the plastic plate likes to wander around), re-install the slide on to the frame and verify function of the striker, trigger and that the decocking button no longer works. The button may move a slight amount but it will no longer be able to move far enough to decock the weapon.
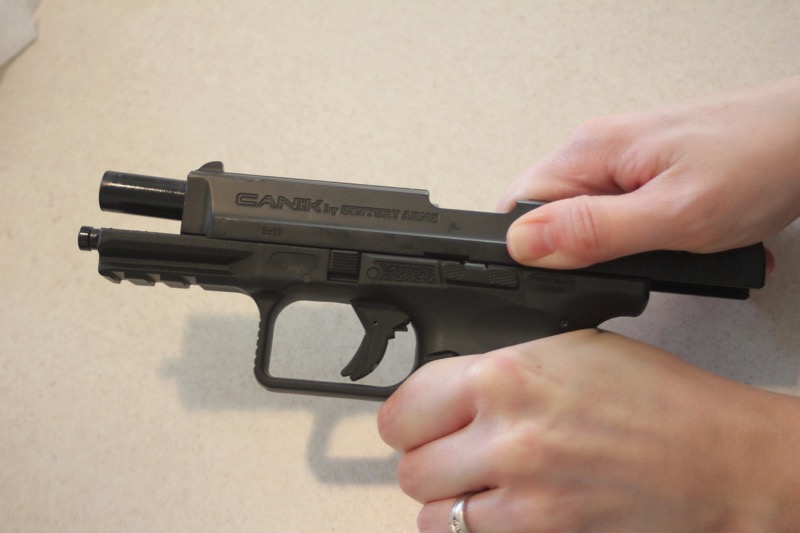
If all is well, proceed to the range and test fire to ensure proper functionality. The Decock Block plates do not interfere with the regular functioning of the pistol in anyway when installed properly.
If for some reason you would like to remove the Decock Block, simply repeat the instructions but remove the Decock Block plates instead of installing them. Easy as pie.
Warning: Modifying firearms can be dangerous if done improperly. Arson Machine Co. cannot be held liable for any damages incurred due to improper installation, malfunctions or usage outside of the intended purpose of this product. If you do not feel comfortable installing this product yourself, contact a gunsmith or other firearms professional for assistance.
J
THANK YOU… This device will make this pistol more serviceable.